Homemade Food With No Special Equipment

As more of us try to adapt to a wholesome diet, with fewer refined foods, the skills which we were in danger of losing are finding favour again.
Bread-making is up there with the best of them!
Nothing, not even the near certainty of producing a successful loaf from a bread-making machine, can match the satisfaction of using traditional methods.
Getting your hands into that dough and giving it a good pummelling is very therapeutic; and the aroma of fresh bread baking in the oven will win over the entire family to the good life.
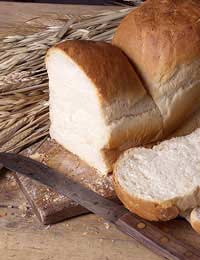
Making Bread by Hand
A useful tip before you start to make your bread is to make sure the flour you are using is at room temperature, even a bit warmer, to speed the process. If the flour is on the cold side, warm it in a low oven for ten minutes then tip it into another bowl.Dried Yeast
Fresh yeast can be bought in bulk and stored in the freezer, but dried yeast is more readily available and is equally good. The water for mixing with the dried yeast should be hand-hot. Measure out the water from your recipe (many bread flours have good recipes on their packs) and pour one-third of the water into a second jug. Add the sugar to this then sprinkle in the dried yeast. Stir once and leave it until it forms a frothy head - usually around ten minutes. To raise the dough you want a froth about 2cm deep.Mixing the Dough
Add the salt to the flour and blend it in thoroughly. Pour the yeast liquid in to the flour and mix to a dough, gradually adding the rest of the water from the second jug. Flours vary so you may not need all the water, or you may require a spot more. Add enough to give you a smooth dough that will leave the bowl clean.Don't worry if you overdo the liquid. Just sprinkle in some more flour and allow extra rising time.
Kneading to Make the Bread Rise
When you have to knead the dough (not all recipes require this) place the dough on a flat surface and stretch it away from you, using the heel of one hand. Lift the edges over and back to the middle and use both hands simultaneously to stretch and lift the dough. This rhythmic working will soon have the dough springy as the gluten reacts.White bread dough will become more elastic and rise much more than a whole wheat dough because the white flour contains more gluten.
Resting the Dough to Help it Rise
Now that it's kneaded the dough must be left to rise. It is best to leave it in a warm place. Cover the bowl with cling-film or a damp tea towel to keep the heat in and to discourage a skin from forming. Go away for at least an hour - longer if you can wait - and do something else. The dough should have doubled in size by then.'Proving' or Second Rising
Some recipes call for a second rising or 'proving'. The dough is knocked down by punching all the gas out of the dough and bringing it back to its original size so that it can rise a second time in the baking tin before going in the oven.Baking your Bread
Now you are ready to bake and you should generously grease all baking tins. Always bake bread in a hot oven (from gas mark 6 or 200 degrees C) and it is better to over-cook rather than under-cook it. When ready, the loaf should sound hollow when you tap it on the underside with your knuckles.Ice Cream Anyone?
For a time, an ice cream maker was the appliance to have. Yet it often finds its way to the back of the cupboard with the bread-maker.You can make delicious ice cream using only your blender or an electric whisk. This low fat recipe, using yoghurt instead of cream, is a good basic guide. It serves six.
Ingredients
- 450g of soft fruit (raspberries, strawberries, blackcurrants, redcurrants, blueberries)
- 2 eggs
- 225g Greek yoghurt
- 175ml red grape juice
- 1 tbsp powdered gelatine
Puree the fruit in the blender or food mixer and rub it through a sieve into a bowl to make a smooth puree. Separate the eggs and whisk the yolks and the yoghurt into the fruit puree.
Heat the grape juice in a pan until almost boiling, but do not boil. Remove from the heat, sprinkle in the gelatine and mix in until dissolved.
Whisk the grape juice mixture into the fruit puree and pour into a freezer-safe container. Place in the freezer until it is half frozen and of a slushy consistency.
Whisk the egg whites until they are stiff and quickly fold them into the half frozen mixture. Return to the freezer and freeze until almost firm. The ice cream is ready.